This knowledge base article covers the Tag Field component in the Label Designer. The Tag Field is used to place dynamic text on your label - text that changes based on the data from the RFID tag being printed. It’s ideal for displaying values such as serial numbers, product names or descriptions, or any custom field associated with the tag.
Use this component whenever you need text on the label that updates automatically for each tag printed. You can control the appearance and positioning of each Tag Field, just like with static text elements.
For a more general overview of using the Label Designer, see this knowledge base article.
Adding a new Tag Field Component
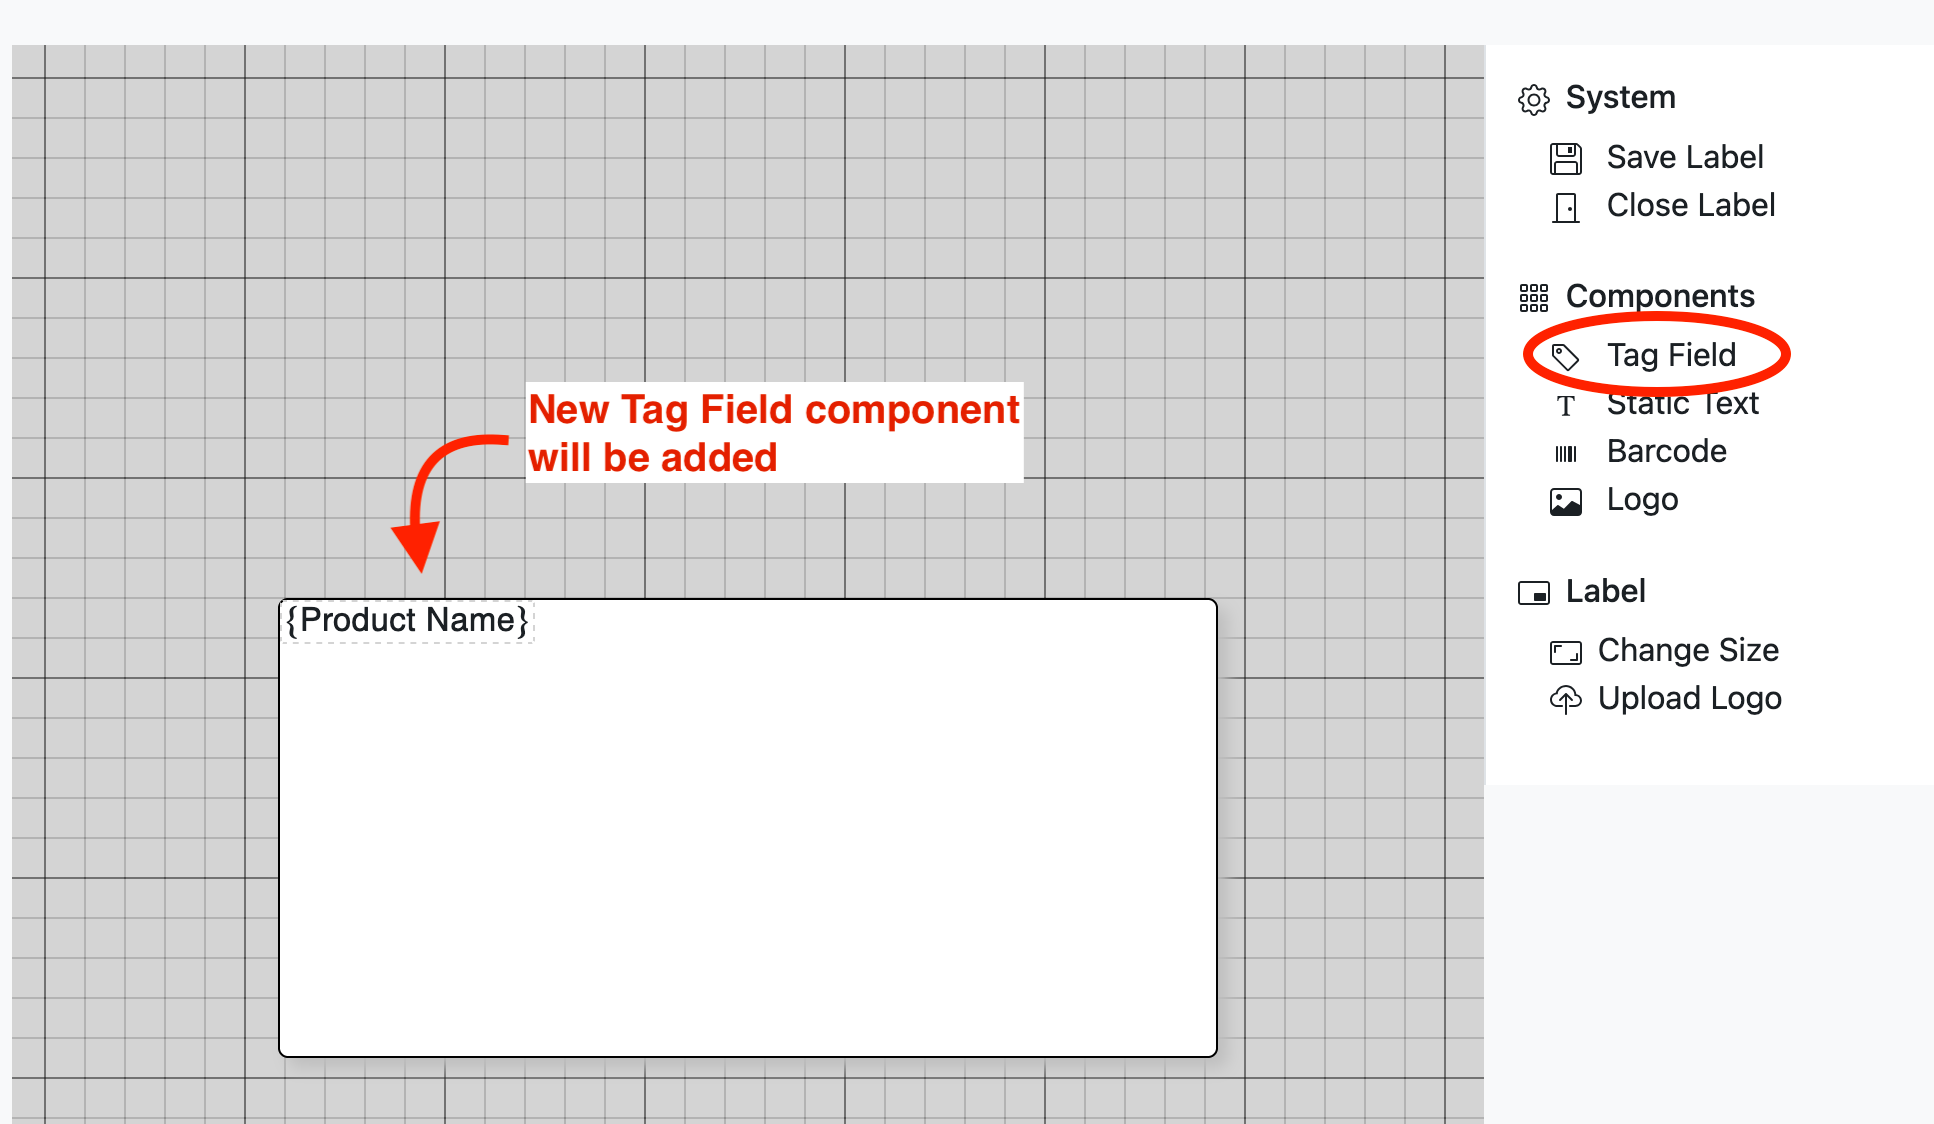
To add a dynamic text element to your label, select Tag Field from the Components section of the toolbox. This will insert a new Tag Field component into your label design.

By default the added Tag Field component will be configured to display the Product Name associated with the RFID tag being printed. Because the actual value of a Tag Field is dynamic and will change based on the data in each tag, in the label preview tag fields are shown using braces to indicate their source - for example: {Product Name}. When the label is printed, this placeholder is replaced with the actual value from the tag’s Product Definition.
To modify the properties of a Tag Field - such as changing which tag data field it displays - click on the component once to open its popup menu, then click the Edit icon. From there, you can choose a different field to render or adjust other settings related to the component.
Editing Tag Field Properties
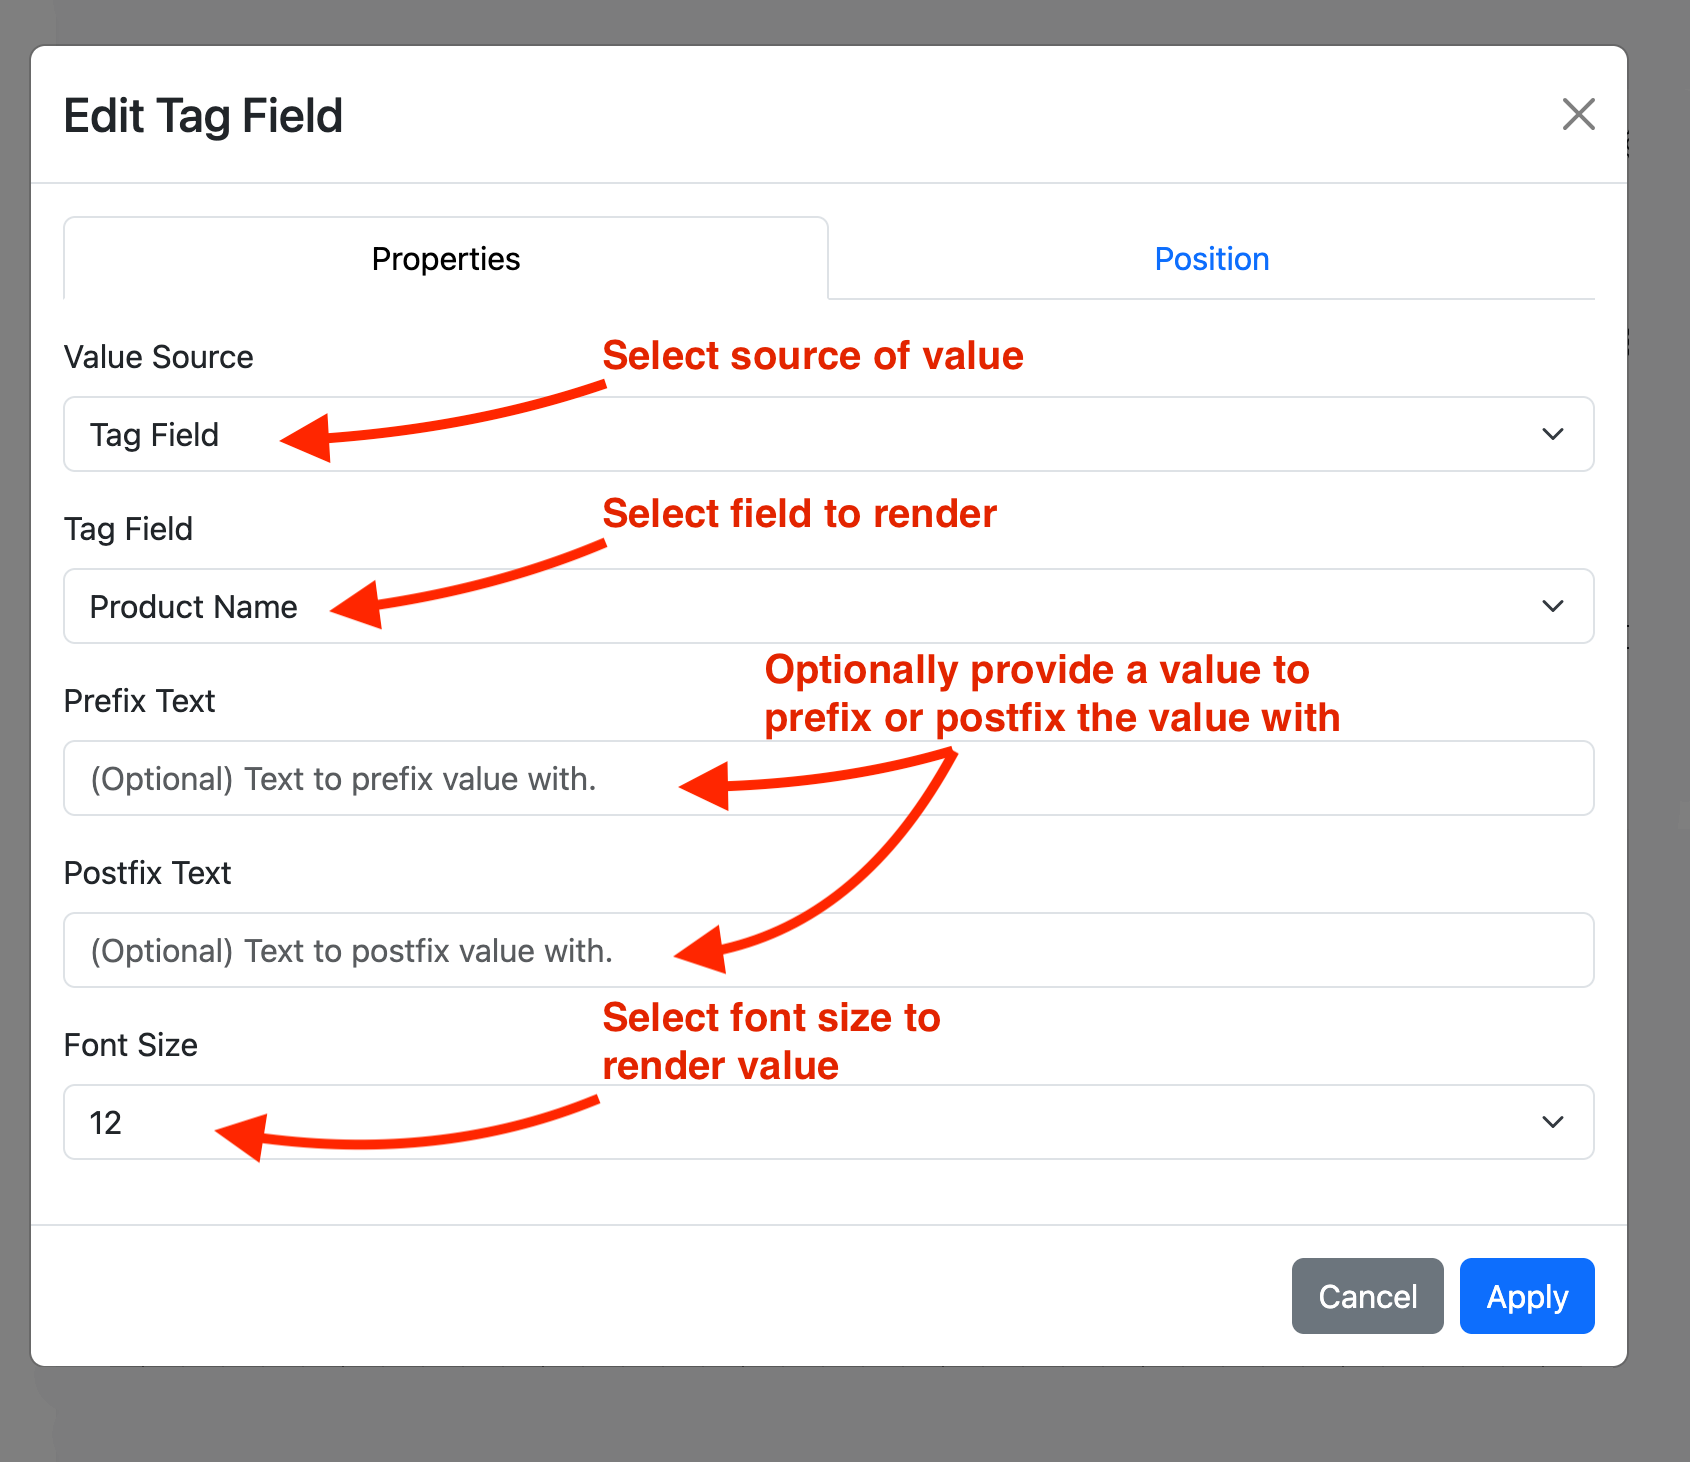
You can adjust the which field will be rendered, an optional static Prefix and/or value, and the size of the text.

Value Source
This option allows you to select the source of the value to be rendered. Selecting Tag Field will
allow you to select a field that comes from the tag being printed.
Examples include EPC, Serial Number, Product Name, Product Description.
If you are printing SGTIN96 tags then the UPC, EAN13, GTIN14, and GS1
identifier fields can be printed.
Selecting Custom Field will allow you to select a custom field value associated with the tag being printed.
Prefix and Postfix Text
Tag Fields support optional
prefix and
postfix values - static text that can be automatically added
before or
after the dynamic field value when the label is printed.
This is useful for adding inline labels or annotations without needing to place separate Static Text components. For example, if you want the output to appear as Serial#: 12345, you can simply set the prefix value to Serial#: The Tag Field will then render on the label preview as
When printed, the {Serial Number} placeholder will be replaced with the actual serial number value from the tag.
Editing Tag Field Position
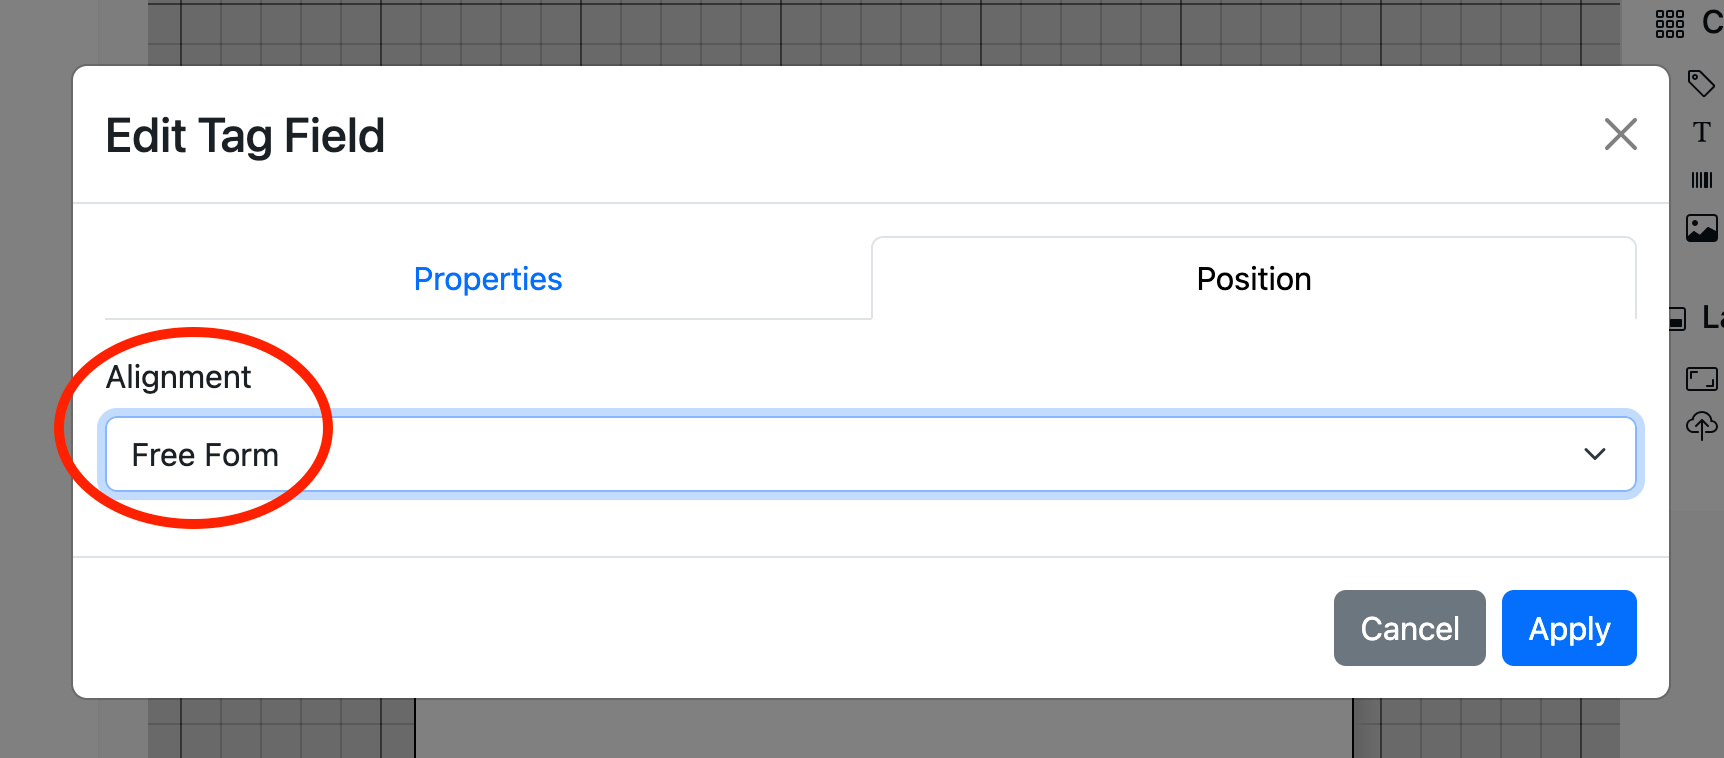
You can configure the alignment of the component using one of four modes: Free Form, Left Justified, Centered, or Right Justified. These settings control how the component behaves horizontally within the label layout.

Free Form
Free Form allows you to
freely drag and position the Tag Field anywhere on the label without alignment constraints. This offers maximum flexibility, but since Tag Field values are dynamic and can vary in length (depending on the tag being printed), you should take care when placing them. A value may end up
wider or narrower than what is shown in the label preview, so it’s important to ensure that the rendered text won’t run off the edge or overlap other components.

Centered
The Tag Field will be automatically
centered horizontally within the label. Regardless of how long the rendered value is, it will always remain centered relative to the label width. You can still drag the component vertically to adjust its position within the label.

Left Justified / Right Justified
Align the component to either the
left or
right edge of the label, respectively. You can also configure a
horizontal padding value to offset the component slightly inward from the edge. As with other alignment modes, vertical placement remains adjustable by dragging the component up or down in the layout.